

identifier : my reposition notes
selector : #wb_Image1
reposition mode : top-left
position : absolute
offset | left : 0+win1.5 <--- one and a half viewport to the right
offset | top : 0+win0
fullscreen | width : 0+win0.5 <--- stretch half viewport width
fullscreen | height : 0+win0.5 <--- stretch half viewport height
fullscreen | target child : auto
...
mode | target : window
mode | force : method 1
OFFSET LEFT + TOP CONSTRUCT
The property offset | left + offset | top is constructed in the following manner
The property offset | left + offset | top is constructed in the following manner
PROPERTY CONSTRUCT OTHER MODE ?
The construction of the offset and fullscreen properties in the other reposition modes is extremely versatile
01. positive - 02. negative - 03. floating point - values can be used
position = on pixel level (pos/neg) and window/object level (pos/neg/float)
dimension = on pixel level (pos/neg) and window/object level (pos/float)
PROPERTY CONSTRUCT MATRIX MODE ?
SELECTOR CONSTRUCT
The construction of the selector in the matrix mode can be done in 2 manners, as a string or in a shorthand method
ie.
string = Layer1,Layer2,Layer3,Layer4
shorthand = Layer+4
Both of these methods will create a matrix on 4 Webbuilder Layers
SELECTOR CONSTRUCT
The construction of the selector in the matrix mode can be done in 2 manners, as a string or in a shorthand method
ie.
string = Layer1,Layer2,Layer3,Layer4
shorthand = Layer+4
Both of these methods will create a matrix on 4 Webbuilder Layers
••• EXAMPLE 1: Inside the window viewport
Reposition a Shape1 into a fixed top-left position
identifier : my reposition notes
selector : #wb_Shape1
reposition mode : top-left
position : fixed
...
run on call : Call_Repos_1
This will reposition our Shape1 into a fixed top-left position within the window viewport
Reposition a Shape1 into a fixed top-left position
identifier : my reposition notes
selector : #wb_Shape1
reposition mode : top-left
position : fixed
...
run on call : Call_Repos_1
This will reposition our Shape1 into a fixed top-left position within the window viewport

PROGRAMMABLE CONTROL 1 - DATA
EXPLAIN ?
module | reposition properties can be used to reposition objects into specified positions
Objects can be repositioned inside the window viewport and beyond the window viewport
Objects can be repositioned in fixed or absolute position and even relative by target on object level
This property also holds a powerful specific matrix mode
Which can be used to create fullscreen Webbuilder Layers in a matrix layout
• CONTROLLING WINDOW RESIZE
Module | reposition will continuously calculate reposition on window resize, sometimes we may want to stop this from occurring
ie. if we use module | reposition as part of some custom code, part of a slider or ... ?
Stop window resize per object with jQuery data ...
false = stop reposition on window resize
true = reposition on window resize
dimension = reposition on window resize - only dimension
position = reposition on window resize - only position
example:
$(mySelector).data('reposition').winRes='false';
• CONTROLLING NEW OFFSET ON WINDOW RESIZE
With the above new offset method a repositioned object can dynamically be updated into a new position
But at times we also may want a repositioned object to reposition on a window resize event , continuously
The new data needs to execute before the internal reposition window resize event occurs
jQuery data can also be used to create a function for this ...
example:
setTimeout(function() {
$(mySelector).data('reposition').onRes = function (option) {
$(mySelector).data('reposition').newOL=$(myDynamic).offset().left
or
this.newOL=$(myDynamic).offset().left
};
}, 100);
The function can be removed or destroyed by using ...
example:
$(mySelector).data('reposition').onRes = 'destroy'
remove = remove the function itself only
destroy = remove the function itself and set all it's new offsets to zero
NOTE:
• data( ) must execute after the reposition initialize has occurred, use a setTimeout if needed
• get and set the internal settings with an argument - ie. option.pos
Use fullscreen ie. on Image, SlideShow, Layer, YouTube, iFrame objects etc fullscreen or cut or over multiple viewports
NOTE: calculation here is on window level, the same rules apply if used on object level =mode | target - see here
NOTE: calculation here is on window level, the same rules apply if used on object level =mode | target - see here
MULTIPLE MODES ?
As stated in the beginning module | reposition runs in 5 modes
In this section the focus has been on Method 1 - 01. mode window level and Method 3 - 05. mode matrix
Method 3 - 05. mode matrix is a specialized mode on it's own
Most of the properties of module | reposition can not even be applied in matrix mode
It's specifically designed to create matrix layouts
But module | reposition can do much more then repositioning on window level, it can reposition on object level as well
The properties mode | target and mode | force are used to set the different modes
More information about these modes and the full potential of module | reposition can be found here (mode I target)


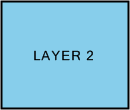
selector : Layer+3
reposition mode : matrix+3 <--- matrix is equal to amount of Layers used, 3 vertical drops
reposition mode : matrix+3 <--- matrix is equal to amount of Layers used, 3 vertical drops
__________________________________________________________________________
more info on module | reposition see here Properties
more info on module | reposition see here Overview Target
more info on module | reposition see here Overview Force
more info on module | reposition see here Properties
more info on module | reposition see here Overview Target
more info on module | reposition see here Overview Force

window viewport
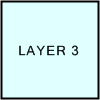
Each Layer maintains it's own height
Unless it's height is smaller then the window height
Content inside the Layer is set to center
Maintaining a relative distance inside the Layer
Each Layer will maintain it's relative position
(and dimension) even on window resize
Unless it's height is smaller then the window height
Content inside the Layer is set to center
Maintaining a relative distance inside the Layer
Each Layer will maintain it's relative position
(and dimension) even on window resize


window viewport
A horizontal matrix
0+win0 --------> offset (window) position calculated
| by window viewport
|
|
|
+---> offset position in pixels
| by window viewport
|
|
|
+---> offset position in pixels
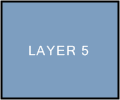
selector : Layer+5
reposition mode : matrix+1 <--- matrix is limited to 1 vertical drop
reposition mode : matrix+1 <--- matrix is limited to 1 vertical drop


window viewport
A vertical matrix


window viewport
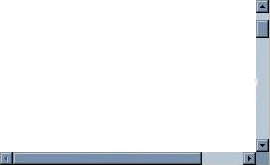
Here an Image is reposition one window viewport to the right
And at the same is stretched to fit the window viewport
Repositioning occurs on window level
mode | target = window
mode | force = method 1
And at the same is stretched to fit the window viewport
Repositioning occurs on window level
mode | target = window
mode | force = method 1

window viewport


advanced!

1.5 window position right
0.5 window width/height
mode | target = window
mode | force = method 1
0.5 window width/height
mode | target = window
mode | force = method 1
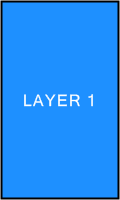
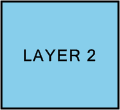
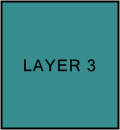
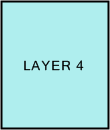
HOW ARE THE LAYERS CONSTRUCTED IN THE MATRIX ?
The reposition mode value is constructed as matrix+X
Where X is the number of vertical drops of the matrix
The Layers are positioned in a vertical descend first, to make the height of the Layer precede over the window viewport
So, although the Layer is dynamically stretched to fit the window viewport, it will first maintain the height of the Layer
The above 6 Layer example of a matrix+2 would be constructed as ...
• ADDITIONAL - ADD (=DATA) - OFFSET
The above jQuery data options can also directly be set and get by using the argument add inside the callback
example:
add.newOL=200 <----- set new offset left position
PROGRAMMABLE CONTROL 2 - CALLBACK
EXAMPLE OF A CALLBACK TO ANIMATE
HEADER TO FOOTER
BEFORE CALLBACK
- reposition object into header position
- var onEvent=false;
INSIDE CALLBACK
if (onEvent) {
option.repos = 'bottom-left';
add.animSpeed = 800;
add.animEase = 'easeOutBack';
add.animAfter = function () {onEvent=false};
} else {
add.animSpeed = 0; // disable animation
}
INSIDE EVENT
- on click --> onEvent=true; reposReset(); // reset reposition
or
onEvent=true; Call_Repos_1(); // reset reposition
REPOSITION MATRIX MODE:
add.minWidth can also be used in matrix mode, by default minimal width is disabled (=false)
Enable this function in the following manner
• enable manual by callback
OR
• set the property fullscreen | width to true (=auto adjust IF page is centered)
add.minWidth can also be used in matrix mode, by default minimal width is disabled (=false)
Enable this function in the following manner
• enable manual by callback
OR
• set the property fullscreen | width to true (=auto adjust IF page is centered)
TRIGGER RESET
Use the function reposReset() to trigger all reposition(s) to reset
Use the function reposReset() to trigger all reposition(s) to reset
• ADDITIONAL - ADD (=DATA) - MIN WIDTH-HEIGHT
In addition an optional minimal width for an object can be set - or this function can be disabled
The following add option can be used
add.minWidth - set minimal width by numeric value or enable/disable with true/false
In addition an optional minimal width for an object can be set - or this function can be disabled
The following add option can be used
add.minWidth - set minimal width by numeric value or enable/disable with true/false
• ADDITIONAL - ADD (=DATA) - ANIMATE
In addition new animate functions can be created for the repositioned object - (position animation only)
The following add options can be used
add.animSpeed - set animation speed (0=disable)
add.animEase - set animation easing
add.animAfter - create a function to occur after the animation completes
In addition new animate functions can be created for the repositioned object - (position animation only)
The following add options can be used
add.animSpeed - set animation speed (0=disable)
add.animEase - set animation easing
add.animAfter - create a function to occur after the animation completes
REPOSITION OTHER MODE:
By default module | reposition will auto adjust a minimal width to an object that complies to the following rules
• page is centered
• object is in absolute position
• target mode is window level
• property fullscreen | width is set to true
• no aspect ratio is enabled
The callback can be used to disable this function or set a minimal width manual
NOTE: when manual is entered all the above rules to comply are overruled, minimal width will execute
----------
NEW - in JMPv3.0 b5.3 - minimal width - enable/disable
- From JMPv3.0 b5.3 on true/false can be used to enable/disable auto adjust
- The minimal width will now also abide WB breakpoints when minWidth is enabled (=true)
NEW - in JMPv3.0 b5.3 - minimal height
In addition an optional minimal height for an object can be set - or this function can be disabled
add.minHeight - set minimal height by number value or disable with false (=default)
NOTE: minHeight can not be used in matrix mode
MODULE REPOSITION - OVERVIEW
PLUGIN
Reposition On
Window or Object Level
+ Matrix Mode
Window or Object Level
+ Matrix Mode
Module | reposition is a collection of multiple modules combined in one, it operates in 5 modes
method 1:
01. mode window level
02. mode object level (+in Layer)
method 2:
03. mode window level
04. mode object level (+in/out Layer, complex structures)
method 3:
05. mode matrix
This section will focus on Method 1 - 01. mode window level and Method 3 - 05. mode matrix
I recommend reading this section first to get a general idea of what module | reposition can do
More detailed information on the different modes can be found below here
The manner in which module | reposition can be used are, just like jor_aniMateMASTERPACKv3.0 itself, too many to list all
Here are some examples and explanations
••• EXAMPLE 2: Outside the window viewport with offset | left
Reposition an Image1 into an absolute top-left position
At the same time stretch the Image to fit the window viewport (fullscreen)
At the same time, reposition the Image one window to the right of the window viewport (=offset left win+1)
identifier : my reposition notes
selector : #wb_Image1
reposition mode : top-left
position : absolute
offset | left : 0+win1 <--- one window viewport to the right
offset | top : 0+win0
fullscreen | width : true <--- stretch full width
fullscreen | height : true <--- stretch full height
fullscreen | target child : auto
...
mode | target : window
mode | force : method 1
...
run on load : true
run on call : Call_Repos_1
This will stretch our Image1 fullscreen, and reposition it one window viewport to the right
The property offset | left + offset | top is constructed in the following manner
The property offset | left + offset | top is constructed in the following manner
NOTE: module | reposition calculates position and dimension even on window resize
What's the use of repositioning objects outside of the window viewport ?
jor_aniMateMASTERPACKv3.0 is just a tool, how it can be used is of course to users discretion
There are numerous possibilities, but ... just image using a Layer instead of an Image ... !
Then again ... that's exactly what the next specific reposition mode matrix automatically will do ...
THE MATRIX ?
Module | reposition also has a specific mode called matrix is Method 3 - 05. mode matrix
The matrix is a powerful function to automatically create fullscreen matrix layouts with Webbuilder Layers
The Layers are dynamically repositioned and adjusted according window viewport and Layer dimension
Maintaining a relative distance, even on window resize
The matrix can build layouts as simple as horizontal or vertical construct or complex column-row structures
••• EXAMPLE
Matrix on 6 Layers, 2 columns - 3 rows
identifier : my reposition notes
selector : Layer+6
reposition mode : matrix+2
...
run on call : Call_Repos_1
This will automatically create a fullscreen matrix for 6 Layers, 2 vertical, 3 horizontal
The function matrix can cleverly be used with the center function of a Webbuilder Layer
As each Layer is set to center it's content, and the Layer is stretched to full window width,
each Layer will maintain a relative distance in the matrix, and it's content will maintain a relative distance to it's Layer
In itself powerful, but even more when used in combination with ie. module | scroll
Scroll from Layer to Layer always maintaining an equal relative distance and dimension inside the window viewport
Scroll from Layer to Layer always maintaining an equal relative distance and dimension inside the window viewport
NOTE: border width can not be used and is automatically disabled in matrix mode
THE MATRIX BEYOND LAYERS ?
Q: Can the matrix be used with anything other then Layers ?
A: Yes
Although the matrix mainly is build to work with Layers it will adjust to work with other objects too
Image, Shape, ClipArt, iFrame, YouTube, jQueryTabs etc (experiment)
Q: Can the matrix be used with anything other then Layers ?
A: Yes
Although the matrix mainly is build to work with Layers it will adjust to work with other objects too
Image, Shape, ClipArt, iFrame, YouTube, jQueryTabs etc (experiment)
0+win0 --------> offset position calculated by (window) viewport
| can be pos/neg/float value
|
|
|
+---> offset position in pixels
can be pos/neg value
| can be pos/neg/float value
|
|
|
+---> offset position in pixels
can be pos/neg value
FULLSCREEN WIDTH + HEIGHT CONSTRUCT
The property fullscreen | width + fullscreen | height is constructed in the following manner
The property fullscreen | width + fullscreen | height is constructed in the following manner
0+win1 --------> fullscreen dimension calculated by (window) viewport
| can be float value
|
|
|
+---> fullscreen dimension in pixels
can be pos/neg value
| can be float value
|
|
|
+---> fullscreen dimension in pixels
can be pos/neg value
••• EXAMPLE
Reposition offset and fullscreen on floating point calculation
Reposition offset and fullscreen on floating point calculation
• CONTROLLING NEW OFFSET
jQuery data can also be used to dynamically set a new position and/or dimension for the repositioned object
This can be useful if a repositioned object ie. is animated relative into a new position or dimension
The object on window resize will not automatically adjust to it's new state but will return to it's repositioned origin
With jQuery data the object can dynamically be updated into it's new state
The data controls are ...
newOL = add new offset left
newOT = add new offset top
newOW = add new offset width
newOH = add new offset height
example:
$(mySelector).data('reposition').newOL=100 = add 100 pixels to it's current position
NOTE:
• The value can be a positive or negative number value
• Note that this offset is a new added offset on top of the internal existing offset
• Setting this new offset to ZERO at any time will make the object return to it's original repositioned state
• A function. or jQuery object can also be used
As of JMPv3.0 build 5 module | reposition can now also programmable be controlled by use of a callback before property
This callback property adds many new powerful options
All the above jQuery data controls can now also directly be applied inside this callback function
It also allows to set and get the internal settings, and in addition adds a new animate option
This callback property adds many new powerful options
All the above jQuery data controls can now also directly be applied inside this callback function
It also allows to set and get the internal settings, and in addition adds a new animate option
b5.0
• SETTINGS - OPTION
The internal settings can be set and get by using the argument option inside the callback
examples:
option.repos='top-left' <----- set reposition mode
option.offLD=true <----- disable option.offL
The internal settings can be set and get by using the argument option inside the callback
examples:
option.repos='top-left' <----- set reposition mode
option.offLD=true <----- disable option.offL
b5.3
b5.1
• ADDITIONAL - OPTION INIT
In addition from JMPv3.0 b5.6 on options and additions can be set by a callback | init. - 2 useful examples ...
01. ESCAPE MASTER
The option escape can be used to escape a WB Master Object as Layer
Module | reposition automatically adjust for many different situations - (border, page centering, fixed, -absolute, etc etc)
But a WB Master Object as Layer (=centered page/object is absolute positioned) can not automatically be detected
With this new option we can adjust manual if required ...
example:
option.escape=true; <----- escape master object as layer
02. ESCAPE RESET
Prevent module | reposition from resetting the entire page
example:
option.auto=false; <----- prevent window reset
b5.6


NEW IN BUILD 5.6
01. NEW
• new option - callback init.
02. NEW-ENHANCED
• new interal option: escape master object as layer
03. NEW-ENHANCED
• mode aspect - allow multi input by class or string
01. NEW
• new option - callback init.
02. NEW-ENHANCED
• new interal option: escape master object as layer
03. NEW-ENHANCED
• mode aspect - allow multi input by class or string
5
The matrix can just as easily create horizontal and vertical layouts
VERTICAL MATRIX
HORIZONTAL MATRIX